Showing posts with label Helpful Tools. Show all posts

Toddler Muffin Tin Lunch

 This simple meal served in a muffin tin is perfect for the little toddler in your life or anyone who wants to nibble on little bites. Muffin Tin Meals are a great way to get toddlers, preschoolers, and children to try new foods in a  fun and engaging way. To learn more, visit the Muffin Tin Meal FAQ page


In this Muffin Tin Meal for a toddler: 

  • Puzzle piece mini ham sandwiches
  • Sliced green grape pieces
  • Mini orange slices
  • Slices string cheese circles 
  • Fresh spinach leaves (A stretch I know, but my kids love them)
Creating little-ish foods was fun!

I love The Lunch Punch brand sandwich cutters. They are easy to use and come in a variety of fun and engaging shapes for toddlers, preschoolers, and children.

For today's muffin tin lunch, I used the puzzle piece cutter. It's part of a 4 pack. The cutters are also dishwasher safe, which is a huge bonus for me. Find out more at TheLunchPunch.com


Disclosure: I was not compensated by The Lunch Punch to write about them. 


I would love to know what your toddler's favorite food is!

Sort Legos in a Muffin Tin


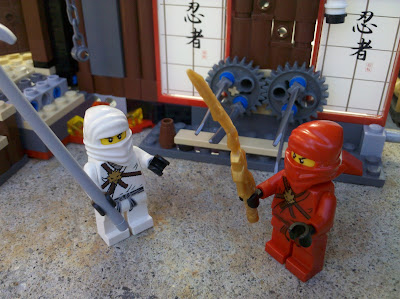
Putting together those new Lego sets can sometimes be a challenge. Muffin Tin Boy received some pretty amazing Lego Ninjago sets for Christmas and the Legos seemed to be continually sprawled across  the middle of the family room as he was searching for each piece. Plus, I would inevitably step on a piece or three.

Enter my solution to keep the pieces easier to see and assemble and easy to put up and out of the way mid assembly. Sort them in a muffin tin (or cupcake pan if that's what you call it).


For the larger sets, we used two muffin tins.


Click here to see More uses for a muffin tin

Scrabble Tiles + Muffin Tin = Alphabet Sorting Fun!


If you own the board game Scrabble (or Bananagrams, which is a "speed scrabble" knock off pictured above), then this is a fun sorting activity for your preschooler.

Grab all your tiles and an empty muffin tin.
ave your little one sort the letters into each cup.
This activity works best with two 12 cup tins (but can always be altered of course).
We ended up putting the x's, y's and z's in a little pile next to the tin.

The Muffin Tin Kids loved it!

My son, who is not as alphabetically advanced as my daughter, liked the scaled down version I made below. I chose A,B and C and had him put them in order- he loved that.


It just goes to show that there are a myriad of uses for those muffin tins!

*Originally published on this blog on 11-22-2008, reprinted with permission

My Child Ate The Rainbow! Promoting Healthy Eating Habits For Kids

It can be hard to know if your child is getting the right amount of fruits and vegetables each day. That's one of the many reasons I love Muffin Tin Meals, the individual compartments can be filled with a variety of fruits and vegetables.

One mom has created a fun and engaging tool to get kids to eat a rainbow of fruits and veggies each day. Kia Robertson is a mom and founder of Today I Ate A Rainbow!™. Kia champions the idea that parents have the power to instill healthy eating patterns in their kids.

From the website:
"We believe that parents have the power and ability to set healthy eating habits. All it takes is some knowledge, useful tools and lots of fun!

“Today I Ate A Rainbow!™” is an interactive nutritional chart that makes eating fruits and vegetables fun for your children! This tool will allow your children to easily track the fruits and vegetables they eat throughout the day."

I love that it is a proactive approach that teaches children to keep track or the healthy habits themselves.

Included in the kit:
The colourful Today I Ate A Rainbow!™ chart
Bright cartoon magnets
The Rainbow Bunch book

Color coded shopping list


The kids loved getting to choose their color magnets and put them on the chart after each meal (I am realizing we need more fruits and veggies at breakfast time). The chart lists fruit and vegetable suggestions in each color category. The kids were quick to find their favorites and point out foods they'd like to eat more of.

You will most definitely want to watch the first episode of The Rainbow Kitchen featuring  Kia and her adorable animated daughter who you can tell loves fresh veggies and fruits. They make kale chips look not only delicious to eat, but fun to make.


Today I Ate A Rainbow!™” is also a great companion to Muffin Tin Meals . 

Keep Sliced Apples Fresh With Ginger Ale

We usually don't pack sliced apples in our school lunches for the simple reason that apples, when sliced and exposed to air, turn an unsightly shade of brown. That has changed since we tried one of the many apple-slice-saving ideas out there - soaking them in ginger ale for 10 minutes (I also hear any lemon-lime soda will also work).

This technique is also fantastic for packing shaped apple slices in your bento and easy lunchboxes. Best thing about it? Apples still taste like apples!

Sources:
The Make Your Own Zone
WikiHow

What kinds of tips have you heard about for keeping apple slices from turning brown?

Make Your Own "Lunchable"


My kids love Lunchables. I think for the very same reason they love Muffin Tin Meals. Cute little compartments for little food. But, I die a slow death every time I purchase one, because lets face it, "processed" doesn't even begin to describe what's in "cheese food product".

So when Muffin Tin Girl wanted a Lunchable for a snack yesterday, using our Easy Lunchbox, I was able to create a DIY version at home. However, for the homemade version to pass off as the real thing, I knew I would have to present the bread, cheese and meat creatively by cutting it into circles and lining up the deli meat on food picks.

Worked wonderfully! And I was able to control the quality and quantity of the food in her homemade Lunchable. Something this mom likes very much.

**Update: If any of you clicked the link above and got an affiliate signup screen-I am soooo sorry! I have updated it to the correct non-affiliate link!

Giving Up Naptime


I am so pleased to welcome Allie of No Time For Flashcards as she opens up about her preschooler's transition away from naptime, the importance of routines and the tools and methods that have helped her along the way.

RIP Nap Time

My son is almost 4 years old and in that time he has probably slept through the night 20 times. I often refer to him being "allergic to sleep" as a way to make light of what took me a long time to accept, he is simply not a sleeper. The only shining silver lining was that he was a great napper. Was. Can you hear me crying? I am so sad he isn't napping anymore. In June, he became a big brother and during my daughter's super sleepy newborn days I could get them both down for wonderful long naps. I admit I was kinda smug about it. I should know by now if you brag, it will jinx you.

The breakdown came when I was trying to get him down for a nap, baby girl was asleep, my workout clothes were on and I was ready to sweat and try to reclaim my not so fat jeans ( my skinny ones are months down the road), and I lost it. He wasn't settling and I hear the hungry cries from the other room.

" I just want to fit into my clothes!"

I started crying harder than my infant , my son looked at me like I had two heads and that was the last day we even tried to take a nap.

Enter Quiet Time.

It's not really quiet and we are still working on making it a full hour but I have learned a few things since starting this new adventure a few months ago.Some kids need structure. Just going into a room with toys and closing the door may lead to disaster and possibly carpet cleaning. Here are some things that have worked for us.

# 1, 2, 3 !

I use little cards I made with the numbers 1-3 on them to choose three activities for my son to do in his room. Today he read a pile of books, used his magna doodle then played post office . After he is done those three activities he can play with anything in his room. This has helped him focus on something instead of simply focusing on opening the door and asking " Can I come out yet?" I switch up the activities daily ( puzzles, Lego, stickers) and try to have a large rotation so he doesn't get bored.

A Clock !

This works marginally well for us ( I haven't given up yet) but I know has worked beautifully for many friends. Give your child a clock and show them where the hands have to be before they may come out of quiet time. I show my son every day but if he is "done" it won't matter. With kids like my son, try an incentive.

Remove anything that might trigger shenanigans.

My son loves music. He loves making music with drums, his keyboard and harmonica. He is not allowed to play with these toys during quiet time. Instead of running upstairs 300 times to tell him no and get into a negative loop with him and attention , I take them out every day and return them once his sister is up from her nap.

Routine and Rituals

Kids crave routine and being able to predict what will happen next. My son knows that quiet time starts at 2pm, it's always in his room and knows that when it's over we have "Today's snack" and chat while his sister naps. Then he may play quietly for another hour , do a craft or learning activity with me, go outside or read. At 4pm he may watch a show if he has been listening. The rules are always the same, the house is peaceful and it's helped get over the insanity of no nap.

Giving up naps has changed us as a family, now my son goes to bed at 7:15 and is asleep before 8pm, which gives my husband and I some extra together time a bonus we hadn't thought about. It has also given my son and I more time together during the day while my daughter is sleeping, which I think has really helped his adjustment too. I don't get as much alone time but as angry as I was getting when he would fight his nap simply wasn't healthy. So like all parts of parenthood you try stuff until it works, I hope some of the things that have worked for us will help you too.

[image credit: Dianna]
--
Allison McDonald is the wonderful blogger behind No Time For Flash Cards, a website full of activities, crafts and ideas for young children. She is one of my daily blog reads and I count it a privilege to have her guest post here today. Thank you, Allie! For more fantastic ideas about how to promote play, discovery and learning in your child be sure to visit www.notimeforflashcards.com

Vons Home Grocery Delivery

It feels like just yesterday that my daughter, now 6 (and a half, she'd like you to know) was born. I remember being so tired that last trimester and for a brief few weeks I was laid up on bed rest. I had seen these grocery trucks driving by and heard about Vons.com and that you could order groceries online and have them delivered to your house. This sounded like the perfect option for me, as the thought of strolling down aisles of my local Vons grocery store for that week's sustinence seemd like a very daunting task at 8 months pregnant (I had cankles, people!)

I remember being so relieved when the man in the nice polo shirt showed up on my doorstep with arms full of groceries. I didn't have to set foot outside the house and I could rest my feet (erm, cankles) on a propped up pillow in peace.

As my daughter grew older and we added one more to make us a family of four, I looked forward to those lazy strolls down the aisles of my local grocery store, all by myself. I would pour over every item that slightly piqued my interest in hopes of prolonging my "alone time".

These days, I am thinking it would be nice to spend that time crafting, creating, spending time with Muffin Tin Dad or to catch up on blog reading.

So when I revisited Vons.com  recently (whose family of grocery stores include Vons, Safeway, Pavillions to find out if Vons.com serves your area visit the Vons.com FAQ page ) I was thrilled to see my old friend still there, ready to help me shop in the comfort of my own home (and my favorite black yoga pants).

Ordering your groceries online isn't difficult. In fact, Vons.com makes it easy with just a few clicks of the mouse.

I was able to set up an account (or in my case, re set up). Browse items by category or by aisle, shop any time day or night, schedule my groceries to be delivered as early as the next day (sometimes in less than 24 hrs) and pay for them all in a few simple steps.

Things I loved:

  • Shop at anytime, day or night. Seriously. I completed my order at midnight and had it in my hands at 1pm the next day.
  • Shopping by aisle. I could find items quickly, just like my local store 
  • Free shipping on my first order, and delivery as low as $6.95
  • Savings offered via the Vons Club Card are automatically included.
  • Saves your purchase history for a simplified online shopping experience the next time around
  • Order party platters from the Deli/Signature Cafe for your next birthday party, monday night football, or family get together and have it delivered right to your home!
  • Have the choice of accepting other brands or sizes in case the one you chose is not available

In the future, I 'd love to see the ability to use gift cards.

You don't have to be on bed rest or be home bound to enjoy all the benefits that Vons.com has to offer. However, I think Vons.com would be perfect for:

  • Expecting moms on bed rest
  • Working Parents
  • Stay-at-home parents with preschoolers and toddlers 
  • Those without a car
  • Senior Adults who are unable to go out
  • Busy professionals
  • Fantastic way to surprise a needy family with some much needed groceries

Would I shop Vons.com  again? Yes, absolutely.

AN EXCLUSIVE OFFER FOR YOU!

The folks at Vons.com have graciously given me a promotional code to share with you: MUFFIN
Using the code MUFFIN at check out provides you with not only FREE SHIPPING but $7 off your first order of $50 at Vons.com

What about you? Would you use Home Grocery Delivery? Do grocers in your state offer something similar?

*Disclosure, I was given 2 Gift Cards in order to shop at Vons.com and share with you my experience. My opinions are my own and objective.

Baby Food Jar Preschooler Drinking Glass


I would love for my kids to start using big kid cups. Here is my problem. Either the plastic cups are too light and tip over at the lightest touch or the adult sized glasses are too heavy and cumbersome.

Enter the large baby food jars that my sister-in-law left at our house this week. I decided to try them out as little kid-sized juice cups. They work great!

Other little jars that work: dried beef jars, old canning jars for jam, old glade candle jars

What works for you?

How are (did) you make the transition from sippy to big kid cup?

Save and Store Children's Artwork with a Photo Book


I have figured out a way to "save" and store children's artwork without actually saving it.

 It's the end of the school year for our family and we have garnered piles of glittery-glued on-painted-handmade craft projects. Each of my children made many wonderful pieces of artwork that we have been able to treasure all year long. In particular, Muffin Tin Boy made a handful of Letter Of The Week craft projects and I have saved them all. But, most of them are 3D masterpieces that well, take up quite a bit of room. I knew we just couldn't keep every single one and yet, I wanted to be able to have keepsakes from the year. Well,  I have figured out a way to "save" their artwork without actually saving it. 

Create a photo "ABC" book. 

I started with an inexpensive photo album from our local big box craft store (Michael's). They are around $1.99. I happened to have mine on hand for this project.


Next, I snapped several photos of Muffin Tin Boy's artwork and letter of the week projects. I printed them out at home using my HP photo printer and slide them inside the album. I then realized that we were missing a few letters of the alphabet.....hmmm.....what to do....I then realized we could make our very own "letters of the week" to fill in the missing ones by tracing out the letters on his artwork.


Cut it out. Snap a photo. 
And there you have it, instant Letter of the Week from your child's artwork.


I snapped photos of the rest of the artwork that I didn't necessarily want to keep, but wanted to remember. We went through most of them together and the kids decided what projects they loved the most, I set a limit of 2-3 and they got to keep the originals in a large flat box. So now, my little 4x6 photo book holds a year's worth of crafts! IT's compact and lightweight and I still get the benefit of off he craft projects without all of the erm, clutter.

For more, visit these great posts on organizing and storing children's artowrk:

5 Easy Tips For A Great Smoothie

Springtime is here! And what a better way to Celebrate than with a delicious smoothie?! Making a smoothie doesn't have to be complicated and it doesn't have to break the bank. In fact, I love throwing in whatever kind of fruit I have, some yogurt and ice and presto! a smoothie the whole family will love.


Here are some miscellaneous tips to get you on your way to that perfect smoothie

1. 4 basic ingredients: ice, liquid base, fruit
1 cup ice
1 cup liquid (see #3)
2-3 cups fruits
That's my "M.O", but it coesn't have to be yours.

2. Add ice first, then liquid, then fuit.
cuts down on large pieces of ice hiding near the top.
3. A liquid base is a must
1 cup of fruit juice: OJ,apple, pineapple, etc. 
or 1 cupmilk base like milk, yogurt, or ice cream
**milk base makes for a creamier consistency
4. Fruit is the variable. You can add pretty much any fruit together and it will taste yummy. I even have a "go-to" smoothie called "everything but the kitchen sink". If I don't have enough of one item, I just start adding in whatever fruit I have on hand, toss in a spoonful of sugar and it's good to go.


4. When is my smoothie done blending?
This one I learned from my mom. It's done when the smoothie starts folding in on itself. It kind of makes a little "whirlpool" in the center of the blender jug.

5. What if I want it sweeter, but don't want to add sugar? Honey is an awesome substitute, but I wouldn't ever use honey if you were making it for very young children (under 2) as they are unable to metabolize it. 

have fun!


Friday Find: NBC's Today Show segment: Do Bath Toys Carry Germs?


If you need me, I'll be in the bathroom, disinfecting the you know what out of our bath toys...

Folding Drying Rack Works To Dry Kid's Art


We are always painting, gluing and creating around here and frequently we need a place to dry our many art projects. I had seen the expensive drying racks found at teacher supply stores, ogled them, and decided that wasn't in our budget. That's when I realized I had the solution right in my own home! Why go out and spend a fortune on an children's art drying rack, when I could get the same benefit for less with a clothes drying rack (found at your local big box store like Target or Walmart for around $12.99 and sometimes less). The one pictured above is from Target, collapses and stores in the closet when not in use, and even has an area on top to lay large artwork flat. When the artwork is done, I wipe it clean and stow it away. And because I already owned this one, I spend zero dollars!

Do you do messy art projects at home with your kids? If so, where do you put your child's art when it's drying? 

Laundry Intervention: A Day of Reckoning


There it was. The mile high pile of clothes that had taken on a life of it's own. I swore mildy under under my breath at the thought of tackling this beast. What was I going to do? How was I going to tame the wild monster that had so easily taken over the master closet?

I sat there, scratching my head with the tip of my index finger...wondering how it was going to happen. There were a few road blocks to success in my path:
  1. Our bedroom is upstairs. Anyone who lives in a 2 story home knows what the pain of lugging large quantities of clothes up and down the stairs does to a person's soul. It makes you. Never. Ever. Want to do a load of laundry again.
  2. We had one of those canvas and aluminum "laundry sorters": a.k.a. "The Pit of Despair". Sure it might work downstairs, in an actual laundry room- but I thought somehow it would work upstairs in the closet, since we didn't have room near the washer and dryer. Big Mistake. Big.
  3. 4 people in our family + a week's worth of clothes = 9 loads of laundry. Do I need to say more?
  4. The Sock Monster: He lives in our dryer. And eats socks for lunch. I can never get the same amount of socks that go in, to come out.
  5. Getting them in the wash is enough of a chore. But, get them out, fold them and then put them away? You have got to be kidding me.
I stood there for a moment and wished that Beverly D'Angelo from Maid To Order would swoop down, snap her fingers and it would just magically appear clean, folded and in the drawers....

That moment came and went.

I needed  a laundry intervention. I needed to intervene on my own behalf. I was just going to have to figure this out on my own. And needed a lot of strength from God. Because I sure didn't have it in me.

Here's how the intervention went down. There was lots of self talk, some internal grumbling and eventually, by the end of the day, I heard the voice of Giselle from Enchanted singing "Happy Little Working Song".
  1. I decided the cornerstone of my my epic laundry failure was that hideous excuse for a solution called the laundry sorter. It had to go. Now. I picked up a simple vertical hamper from Target. The less laundry it held the better. I would be less inclined to let the clothes pile on top, creating a veritable Mount Olympus.
  2. And instead of lugging heaping piles of clothes down the stairs, I just threw it all over the side of the stairs. Problem Solved.
  3. Along with the new, smaller (albeit taller) laundry basket, I purchased a 12x12 inch mesh laundry bag. Every sock we own goes in there. When I want to do a load, I throw the bag in with the other clothes. Magically, the same socks that go in, come out.
  4. I then purged excess clothing that I no longer need, want or wear. Repeat with husband's clothes. Donate.
  5. Next up, I try and do a load every few days or every day. Usually, we don't have enough of the same kind of load (i.e. darks, etc.) to do an entire load. And I hate doing little kid clothes with grown up clothes. And really, who wants to do laundry every day? Call me weird. So, it's about a two day turnover for us.
  6. When I must do multiple loads of laundry, I try and alternate the types of loads. I do a load of darks, then a load of towls, then a load of lights, then a load of jeans. Thereby, alternating the amount of items needing to be folded and allowing me to catch up.
  7. My husband's stinky running/coaching clothes get their own separate, small basket, away from everyday clothes. Underneath that I stack extra sorting baskets, for days when there are multiple loads.
  8. I also keep a small  basket on top of the washer for dish rags, hand towels, and the odd piece of child clothing that mysteriously makes it's way downstairs.
So far, I am on week 2 and it's working out. Less clothes + smaller hamper size = less overall laundry. And the laundry I am doing, has a working system.

It feels good.

*photo by antwerpenR